Wednesday, July 21, 2010

Picnic-ing


I have decided I don't picnic nearly enough. I love everything about picnics. Sitting in the grass, lounging on a blanket, planning out a delicious meal and sharing it with good friends. Throw in some amazing outdoor music and wine and I am as content as can be. Last week my boyfriend, a friend, and I went to a concert at a gorgeous venue just north Chicago, called Ravinia Festival. It is a beautiful outdoor amphitheater with a sprawling flat green lawn. I have been there a few times now, and it is always a great excuse to make fancy picnic food and grab a few bottles of wine and enjoy a great show. The spreads that people come prepared with are insane, and one of my favorite things to do there is just to walk around and see the creative food and set-ups people brought. Most people don't just show up to ravinia with some pb&j's and a can of beer (not that you aren't welcome to), you gotta go all out and bring your cute picnic basket with homemade goodies and actual glass wine glasses. So that is exactly what we did.

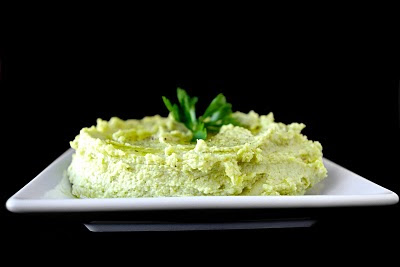
We had a fantastic chicken salad with giardinera on sourdough bread, Israeli cous cous and wheat berry salad with cauliflower and zucchini, and edamame hummus with garlic naan bread. It was a perfect meal to munch on throughout the serene performance by the Swell Season. The weather was beautiful, candles were glowing, wine was flowing, and the night was wonderful. If you live in the area and have never been to Ravinia for a show, make it a priority, you will not regret it. It really doesn't even matter what is playing that night, the ambiance more than makes up for any lack of interest in the music itself (however I must say that Swell Season, aka the couple from the movie Once, were absolutely incredible).
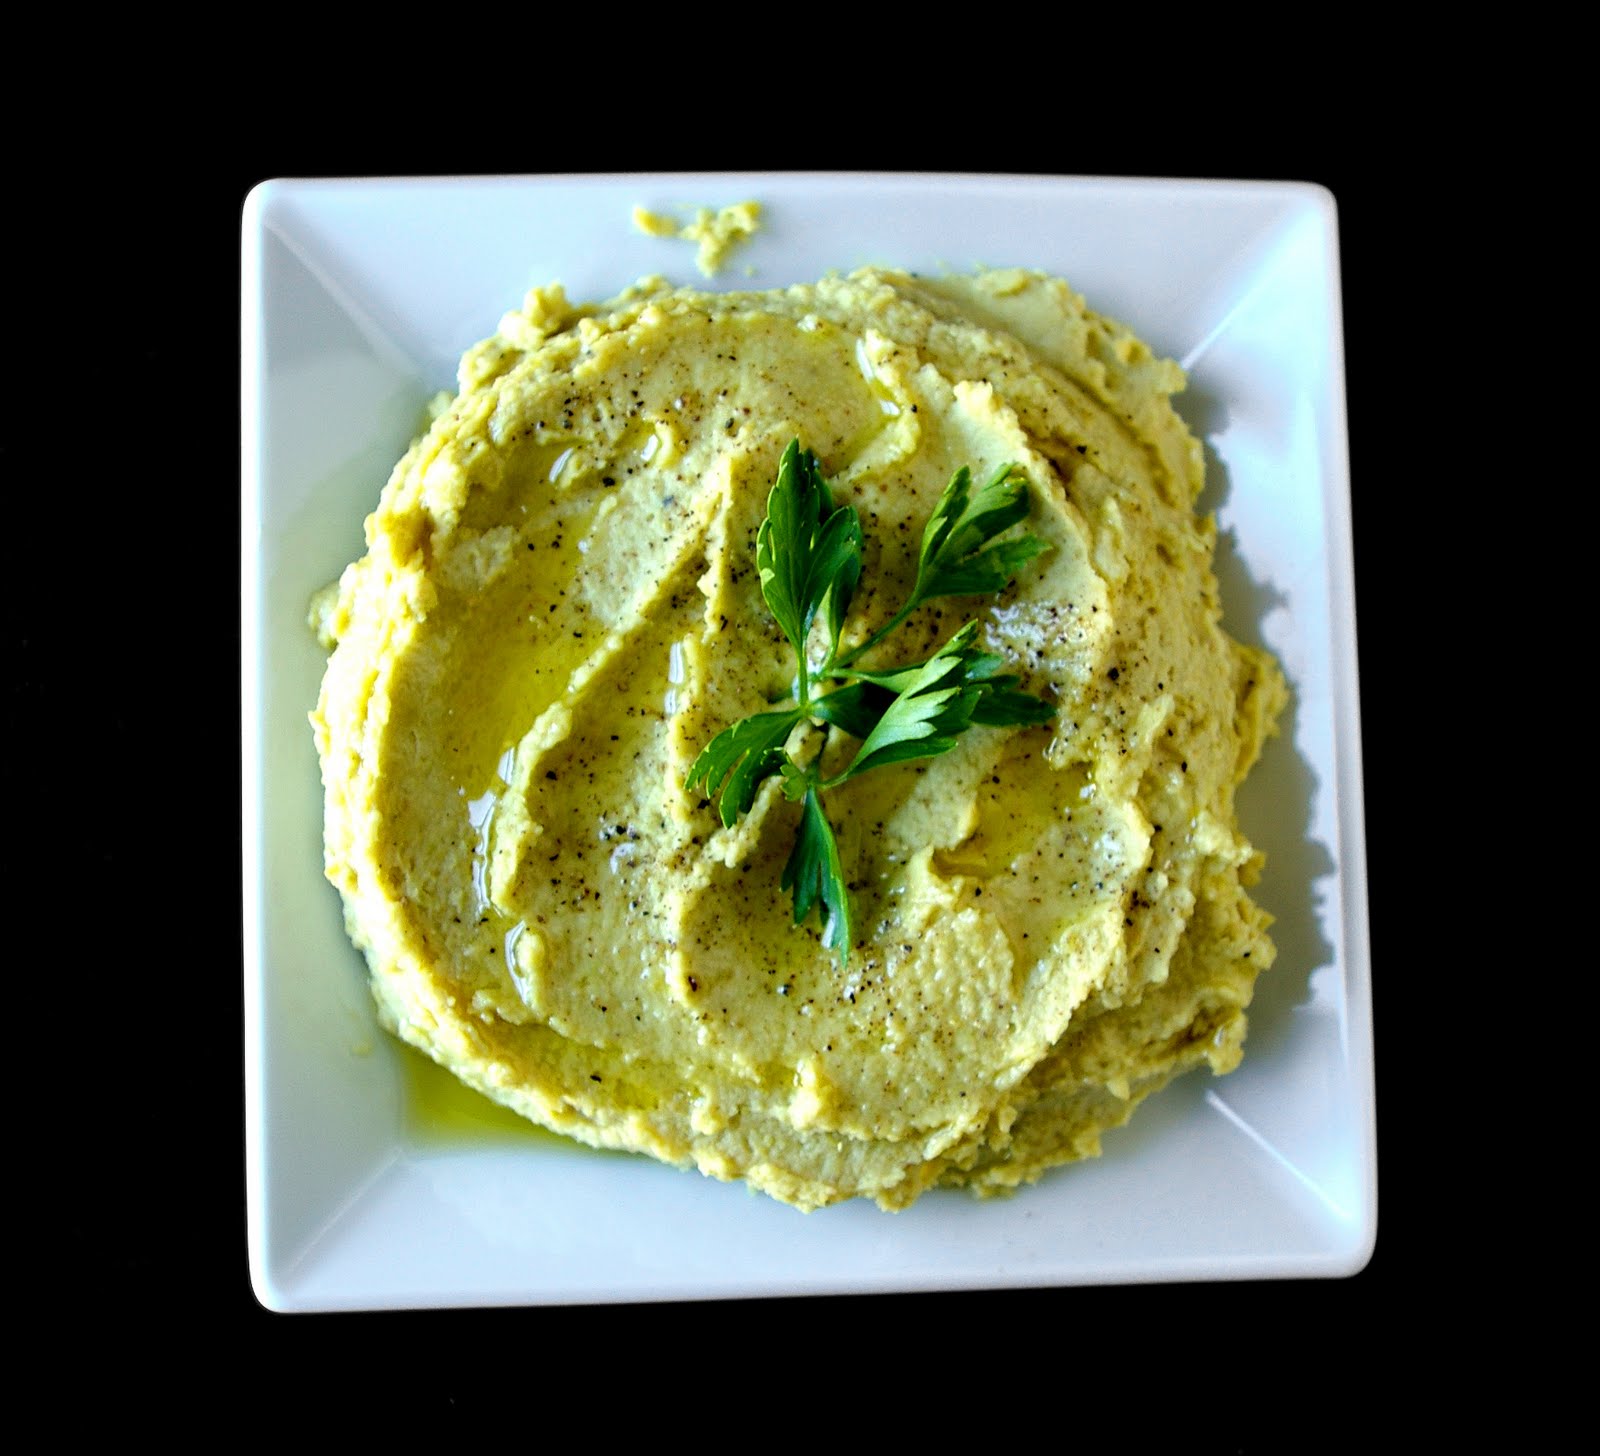

Edamame Hummus
makes a LOT of hummus, about 4-5 cups, feel free to halve the recipe

1 large can of Chickpeas
1 16 oz bag of frozen edamame, cooked according to package directions and cooled
3-4 cloves of garlic
juice of 1 large lemon
1/4 cup tahini (you can add more if you like your hummus very tahini-y)
1/4 cup olive oil (may be more or less depending on desired consistency)
Salt and pepper to taste

Combine garlic, chickpeas, edamame, lemon juice, and tahini in a food processor and pulse until ground into a paste. With processor running, slowing stream in olive oil until it reaches your desired consistency. Salt and pepper to taste and pulse to combine.

Serve with pitas or my personal favorite, toasted naan bread. Someday I will make my own, but for now you can buy some really great packaged naan in many grocery stores, all you need to do it brush it lightly with some olive oil and toast in the oven for a few minutes.

As we are nearing the waning days of summer, I hope you have time to grab some friends or loved ones and settle in on a nice comfy blanket at least once more before the leaves start changing colors.

Thursday, July 15, 2010

Mango Curd Tartlets

Someone at the latest bridal shower I attended/baked for asked me when I started baking, and as followers of my blog and spying all the recent dessert posts, I think expected me to stay "oh forever!!". I actually had to think about it for a second, and I surprised even myself that my answer was "December". It's true that I have been my mom's helper in the kitchen, you know, decorating sugar cookies, sampling chocolate chip cookie dough, etc., since I was little, but I didn't really start baking on my own until this past winter, save for a random cake or cookie here and there over the years.

I was a self proclaimed "cook", definitely not a baker. I didn't even have a muffin tin until last year, folks. I blame most of this lack of interest in baking on the fact that I am not really into eating sweets. I am wholeheartedly an appetizer and main course girl, dessert has always been an afterthought. As you may have noticed, there has definitely been a shift over here as I am realizing that not only am I cooking to eat and savor the food that I make, but I am also enjoying the process of cooking/baking just as much as, if not even more than, the final outcome.

I have also learned, and this will make my parents and their empty wallets happy, that my design degree turns out to be a great background to have in the world of baking. It is quite often that I find myself using the knowledge that I attained while studying hard for four years (okay five, but who's counting?) getting my bachelors in industrial design. My main job as an industrial designer is to make things look good. Superficial? Yes, most of the time, but its also about spending the hours, days, and weeks to make sure what you are designing actually works. Modeling, testing, throwing it away, and starting from scratch is how I spent countless nights in the design studio.This gave me the patience to accept that baked goods don't just miraculously happen, you have to test and test again (and sometimes, test again...twice).

Years of building prototypes of various kitchen utensils and power tools has given me solid, concrete, tangible skills that make me not think twice about the logistics of baking and building a wedding cake. I got this. Wrapping two layer cakes in fondant? Pshh, how about carving a wacky plunger handle out of wood and covering it in a perfectly smooth layer of bondo? I realize that it's not exactly the same, but my experience in design has allowed me to jump into the deep end of dessert land and not look back. I mean, the first thing I made when I got my stand mixture for Christmas this year was French Macarons. Talk about the deep end...

I feel a sense of confidence in the kitchen that I haven't felt in a long time, and its really refreshing in this time of uncertainty. Working two part time, possibly temporary, jobs when you feel like you need to have a 9 to 5 really takes a toll on your sense of stability and direction in life. But, at the end of the day, (and sometimes all night) I can step into the kitchen and create something beautiful and delicious, and it does wonders to boost my ego back up to a normal level. Who needs prozac when you have tart molds and a stand mixer?

[Insert shameless segue here] I am thinking something along the lines of 'speaking of tart molds and stand mixers, nudge nudge wink wink'...

In addition to the cute orange, blue, and white cake pops I made for the shower a few weekends ago, I went a little overboard and made tartlets with the same color scheme. Cake pops are fine and good, but they are pure sugar bombs, and I wanted something fresh and fruity to balance out the dessert selection.

I was aiming for a more natural incarnation of the orange and blue theme, and behold, mango curd tartlets with fresh whipped cream and blueberries were born. These were delicious, rich, tart, and creamy. The mango curd you could probably just eat out of a bowl with a spoon, but putting it in a nice compact little tart shell might make you feel better about yourself.

Mango Curd Tartlets with Blueberries

Mango Curd:

1 - 15 ounce, very ripe mango, peeled, pitted, and cubed
1/2 cup sugar
3 tablespoons lime juice
4 large egg yolks
pinch of salt
4 tablespoons unsalted butter, cut into 1/2 inch pieces

Place mango, sugar, lime juice, and salt in your food processor and blend until smooth. Add egg yolks and puree another 15 seconds. At this point, you can strain the mixture through a fine sieve and remove all the little mango bits, which in turn will make your curd much more translucent and shiny. I skipped this step. Why? Because I couldn't find my strainer and it was 1:00 in the morning. Thats why. Still turned out wonderfully.

Place the mixture in a medium metal or glass bowl set over a saucepan of gently simmering water. Whisk puree constantly until temperature reaches 170 F and has thickened. This will take about 10-15 minutes. Remove from heat and whisk in butter one piece at a time. Let cool a little on the counter, then place in an air tight container and refrigerate at least overnight.

Tart Shells:

1 1/2 cups all purpose flour
1/2 cup powdered sugar
1/4 teaspoon salt
1 stick (1/2 cup) plus 2 tablespoons unsalted butter, cut into 1/2 inch pieces
1 large egg yolk

Place flour, sugar, and salt in food processor and pulse a few times to combine. Sprinkle butter over flour and pulse until butter in in pea sized pieces. In a small bowl break up the egg yolk with a fork and pour over the flour-butter mixture. Pulse to combine, and increase your pulses to around 10-15 seconds until large clumps form. The mixture will be crumbly, but will stick together when you press it into the tart forms.

Turn dough out onto your counter or a large cutting board and knead two or three times just to combine any stray dry bits. At this point you can press the dough into one large tart pan or you can get about 20-24 small 3-inch round tart shells out of this batch. Press the crumbles in gently to the tart molds, you want the dough to be able to bind together when cooking, but not press so hard that the lovely flaky layers get pulverized. Place filled tart molds in the freezer for 15-30 minutes.

Preheat oven to 350 degrees F and place a rack in the middle of the oven. Bake tart shells for 10-15 minutes, turning pan once halfway through, until they turn a light brown color. Feel free to press the bottoms of the shells down with the back of a spoon if they start to puff up during cooking. Let cool in molds then gently remove and let cool completely on wire rack.

When shells are completely cooled, fill with 1-2 tablespoons mango curd and top with fresh whipped cream and a few fresh blueberries or blackberries (or really any other fresh fruit).

I will leave you dear readers tonight with the wish that you find your happy place whether it be in the kitchen or otherwise. The place where you can get lost for a few hours and not think about any of the stresses in life, the place where you feel confident and in control. Because we all need that place.

Pin It

LinkWithin

Related Posts with Thumbnails